
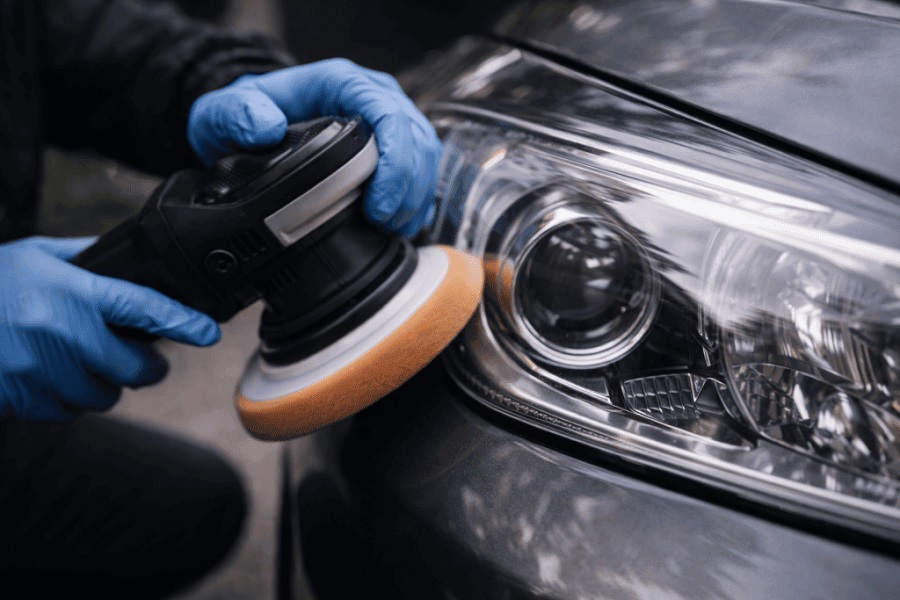

Walking up to your car on a bright morning, you notice it instantly. The sleek, aggressive look of your vehicle is sabotaged by a pair of cloudy, yellowish-brown headlamp lenses that look less like precision automotive lighting and more like cataracts. Beyond ruining the aesthetic appeal of your ride, foggy headlights pose a serious safety hazard. They drastically scatter your nighttime beam, reducing your forward visibility down dark country roads or slick interstate highways when you need it most.
When drivers finally decide to fix the problem, they are met with a confusing array of options on the store shelves or automotive forums. You can buy a cheap, ten-minute restoration paste, invest in a mechanical polishing kit with drill attachments, or commit to a more rigorous professional process involving a two-part aerosol clear coat. Understanding the mechanics of headlight degradation is the first step in choosing a method that offers more than just a temporary cosmetic fix.
The Anatomy of Headlight Degradation
To understand why headlights fail and why certain restoration methods work better than others, you have to look at how modern lamp assemblies are constructed. Decades ago, automotive headlights were made of real glass, which could pit and shatter easily under road debris but remained crystal clear indefinitely. Modern cars utilize high-impact polycarbonate plastic. Polycarbonate is lightweight, highly shatter-resistant, and easily molded into aerodynamic shapes, but it has one fatal flaw: it is highly vulnerable to ultraviolet radiation.
To protect the raw polycarbonate from the relentless baking of the sun, manufacturers spray a specialized UV-resistant factory clear coat onto the exterior surface of the lens during production. Over the years, exposure to sunlight, road salt, acid rain, and abrasive highway grit wears away this protective top layer. Once that factory barrier is breached, the raw polycarbonate underneath oxidizes, turns yellow, and develops a micro-rough texture that diffuses light. When you restore a headlight, you are essentially sanding away this damaged outer layer of oxidized plastic. The entire debate between quick polishing kits and permanent clear coat sealing comes down to how you protect that freshly exposed plastic once you are done sanding.
The Appeal and Limits of Standard Polishing Kits
The most common entry point for DIY car care enthusiasts is the traditional restoration kit found at any local auto parts store. These kits typically feature a series of progressively finer sandpaper discs, a foam backing pad that attaches to a household power drill, and a small tube of polishing compound or chemical sealant wipe.
The Immediate Gratification of Polishing
There is no denying the psychological satisfaction of a standard polishing kit. You tape off your car’s paint, chuck the sanding pad into your drill, and begin wet-sanding the hazy lens. As you progress from coarse eight-hundred-grit paper up to three-thousand-grit, the yellow sludge washes away, revealing a smooth, remarkably clear lens. You apply the included polish, buff it to a mirror shine, step back, and admire your handiwork. Your car looks years younger, and the entire project took less than an hour.
The Inevitable Return of the Haze
The fatal flaw of standard polishing kits lies in what happens after the job is finished. When you sand down a headlight to remove the oxidation, you strip away every trace of the factory UV-protective layer. If you finish the process with a standard polish or a temporary car wax, you are leaving bare, unprotected polycarbonate exposed to the elements.
Without a durable UV barrier, the sun goes to work on your freshly exposed plastic. Within three to six months, the microscopic pores of the polycarbonate oxidize again, and the ugly yellow haze returns with a vengeance. Many drivers find themselves locked into an exhausting semi-annual ritual of sanding and polishing their headlights over and over again because they never installed a permanent barrier.
The Professional Standard: 2K Clear Coat Sealing
If standard polishing kits offer a temporary fix, 2K clear coat sealing represents a permanent structural solution. This method borrows techniques directly from professional auto body collision repair, treating the headlight lens less like a piece of glass to be polished and more like a body panel that requires a proper paint system.
Understanding the Chemistry of 2K
In the world of automotive finishes, 1K products dry purely through solvent evaporation. They remain somewhat soft and vulnerable to chemical degradation, gasoline spills, and UV breakdown. A 2K product—where the “2” stands for two-component—involves a chemical hardener that must be mixed with the acrylic resin right before application.
Inside a specialized 2K clear coat aerosol can, there is a secondary inner chamber containing an isocyanate hardener. When you puncture this chamber using the button on the bottom of the can and shake it thoroughly, a chemical cross-linking reaction begins. Once sprayed onto the sanded headlight, this mixture cures into a rock-hard, highly cross-linked polymer film that provides exceptional chemical resistance and built-in UV blockers.
The Rigorous Preparation Process
Achieving professional results with a 2K clear coat requires far more discipline than a casual polish. You cannot afford to cut corners on preparation. The sanding stage must be executed with extreme precision. You typically start with a coarser grit like six-hundred to level out deep pitting, then step through eight-hundred, one-thousand, fifteen-hundred, and finish around two-thousand to twenty-five-hundred grit.
Crucially, you must avoid over-sanding with ultra-fine grits like three-thousand or four-thousand when preparing for a clear coat. A 2K clear coat relies on microscopic sanding scratches for mechanical adhesion. If you sand the plastic until it is as smooth as glass, the clear coat will lack the tooth it needs to grip the surface, leading to premature peeling or delamination down the road. After sanding, the lens must be wiped down meticulously with a fast-evaporating surface prep cleaner or isopropyl alcohol to remove every trace of plastic dust and skin oils.
Spraying and Curing
Applying the 2K clear coat is where anxiety peaks for most DIYers. You must spray uniform, wet coats across the lens without running or sagging, working in an environment free of dust and wind. Once applied, the magic of the 2K chemistry takes over. The clear coat flows out into a glass-like finish that completely fills in any remaining microscopic sanding marks, restoring absolute optical clarity. The lens is left with a thick, durable shield that replicates or even exceeds the quality of the original factory coating.
Comparing Durability, Cost, and Effort
When deciding which path to take, you have to weigh your long-term goals against your available time and budget.
Time and Investment
-
Standard Polishing Kits: Inexpensive upfront cost, minimal equipment required, and a fast completion time under one hour. However, the recurring labor required every few months adds up quickly.
-
2K Clear Coat Sealing: Higher initial cost due to specialized aerosol cans and safety equipment, requiring a strict, multi-step process that demands patience and precise environmental conditions.
Longevity and Long-Term Value
-
Standard Polishing Kits: Offers a short-term cosmetic revival lasting anywhere from three to six months before oxidation returns.
-
2K Clear Coat Sealing: Provides multi-year durability, often outliving the remaining lifespan of the vehicle itself without yellowing or peeling.
Environmental and Safety Precautions
When undertaking a 2K clear coat restoration, you must respect the materials you are handling. Traditional polish kits are benign, but 2K aerosol cans contain hazardous isocyanates that can cause respiratory irritation or allergic sensitization if inhaled.
You should never spray a 2K clear coat inside a closed garage without proper ventilation. Always wear a dedicated respirator rated for organic vapors and particulate matter, along with protective eyewear and nitrile gloves. Furthermore, ambient temperature and humidity play a massive role in how the clear coat cures, meaning you need to pick a dry, moderate day to complete the project outdoors or inside a well-ventilated workspace.
Restoring your car’s headlights is one of the most rewarding DIY projects you can tackle. It dramatically transforms the appearance of your vehicle and restores your nighttime driving safety. While a basic polishing kit provides instant gratification, committing the time and precision required to apply a professional-grade 2K clear coat is the definitive winner for drivers who want a permanent solution to the endless cycle of cloudy lenses.
